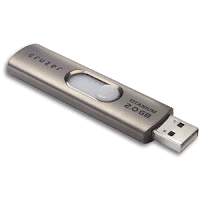
- USB drive containing distro. This means creating a flash disk with the distro for installation on it.
- USB drive containing download trigger. Option 4 means making a USB with a file on it that will trigger the download of the whole OS. Worst option, very time consuming and not reliable.
 The most reliable method I have found is to use PenDrive Linux. Their programs almost always work and you're up and running in about half an hour. Just find the instructions you need, follow them (probably downloading a file) and you're done. The downside to PDL is that they have a limited number of distros that they have covered, but most of the main ones have instructions on there. Also there is room for error, not much, but one small part is from the command prompt, so it is possible to mess up and wipe your whole system - not good! But this is very hard to do unless you have bad eyesight or cannot read English. Other than that it's brilliant. The boot up part is the same and that's it!
The second method I know is to use UNetbootin to create a boot disk. This works most of the time but is not entirely reliable. Just download it, select the distro to install, select the drive to install to and click "create USB". Rinse and repeat. It also has a "create using .iso image", so you can make it using a pre-downloaded .iso. There is one thing about it - the fact that sometimes the thing messes up and doesn't install the OS properly and misses out some important files. This is the reason UNetbootin is not my first choice.
 Lastly, you can use the Fedora Live USB creator. This only works for Fedora though and so is no use for anything else. Works great with Fedora!
And now, option 4 - using a drive containing a download trigger. This is by far the worst option a) because it is very slow and time consuming - can take up to 11/2 hours to fully download b) needs an uninterrupted internet link - you will need a complete link for all this time. If, at any time, it is broken the download will stop and you will need to restart the whole process, although some distros allow you to resume after this. You can create one of these USB drives using UNetbootin. Just select the "netinstall" option when selecting the distro version. Like I have said over and over, this should only be used as a last resort as it really is slow and unstable.
Anyway though, good luck with these and enjoy your new OS.
Disclaimer: I accept no responsibility for any damage done to your computer, be it hardware or software related, caused as a result of following this tutorial. You do this at YOUR OWN RISK!
0 comments until now.
Post a Comment